Why Choose Dental Implants to Replace Multiple Missing Teeth
When multiple teeth are missing, particularly in a row, dental implants provide a stable, long-term solution for restoring both function and aesthetics. The ideal treatment approach depends on various factors, including your oral health, bone density, and personal preferences. Our experienced implantologists will thoroughly assess your condition and recommend the most suitable option, whether it's individual implants or an implant-supported bridge.
These advanced implant solutions not only restore essential functions such as chewing and speaking, but they also help maintain facial structure and prevent further bone deterioration. With the expertise of our implantologists, you can expect a durable, natural-looking smile that enhances both your oral health and overall confidence.
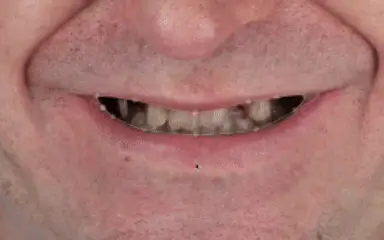
When several teeth are missing in a row, dental implants offer a stable, long-term solution to restore both the function and appearance of your smile. There are different ways to approach treatment, depending on your oral health and preference.
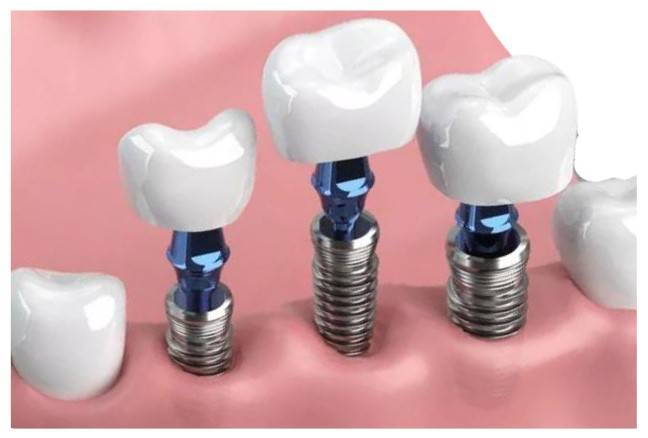
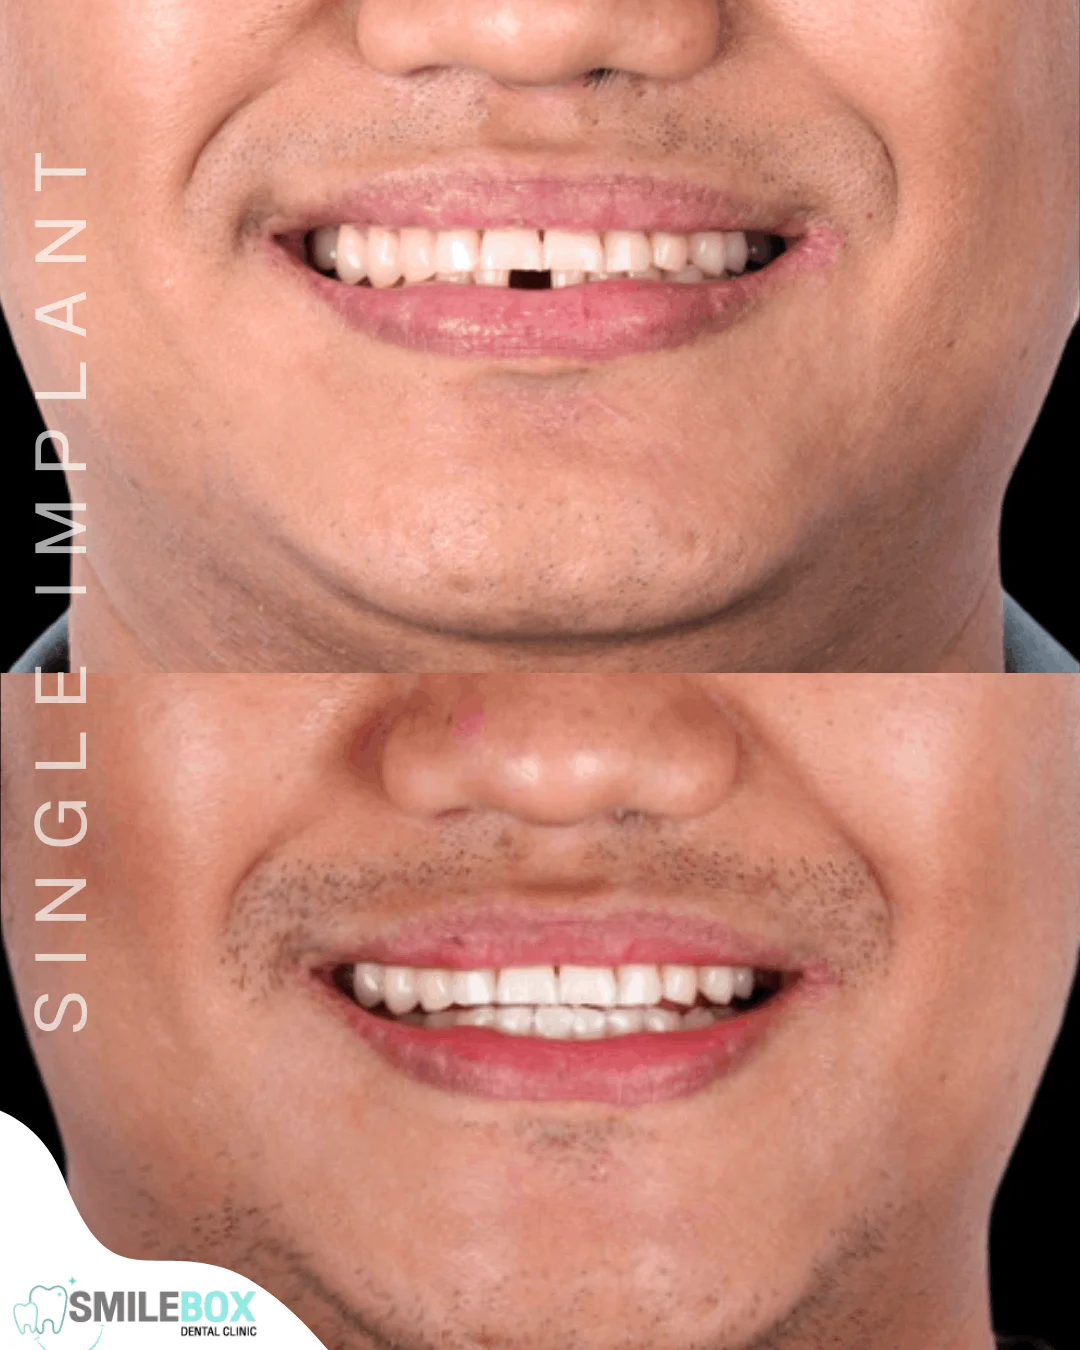
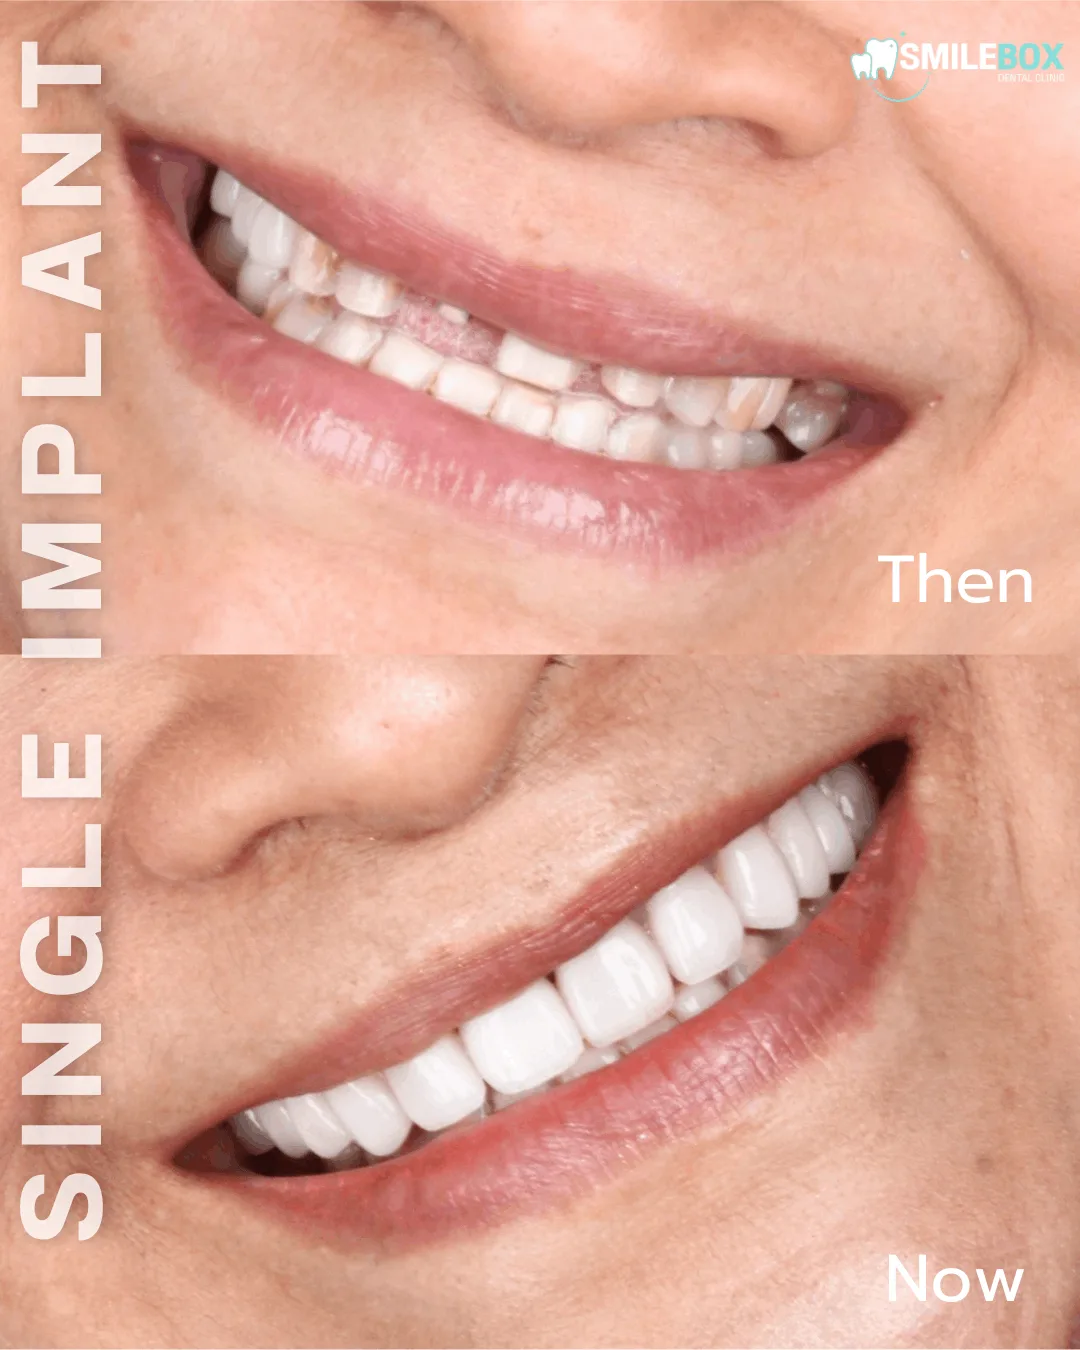
Option 1: Placing 3 Individual Implants
In some cases, it's possible to place a separate implant for each missing tooth. This approach provides the most natural, stable solution, as each implant acts as an independent tooth root. However, this requires enough bone density in the jaw and enough space between the neighbouring teeth to be able to hold 3 seperate implants.
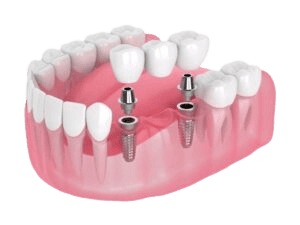
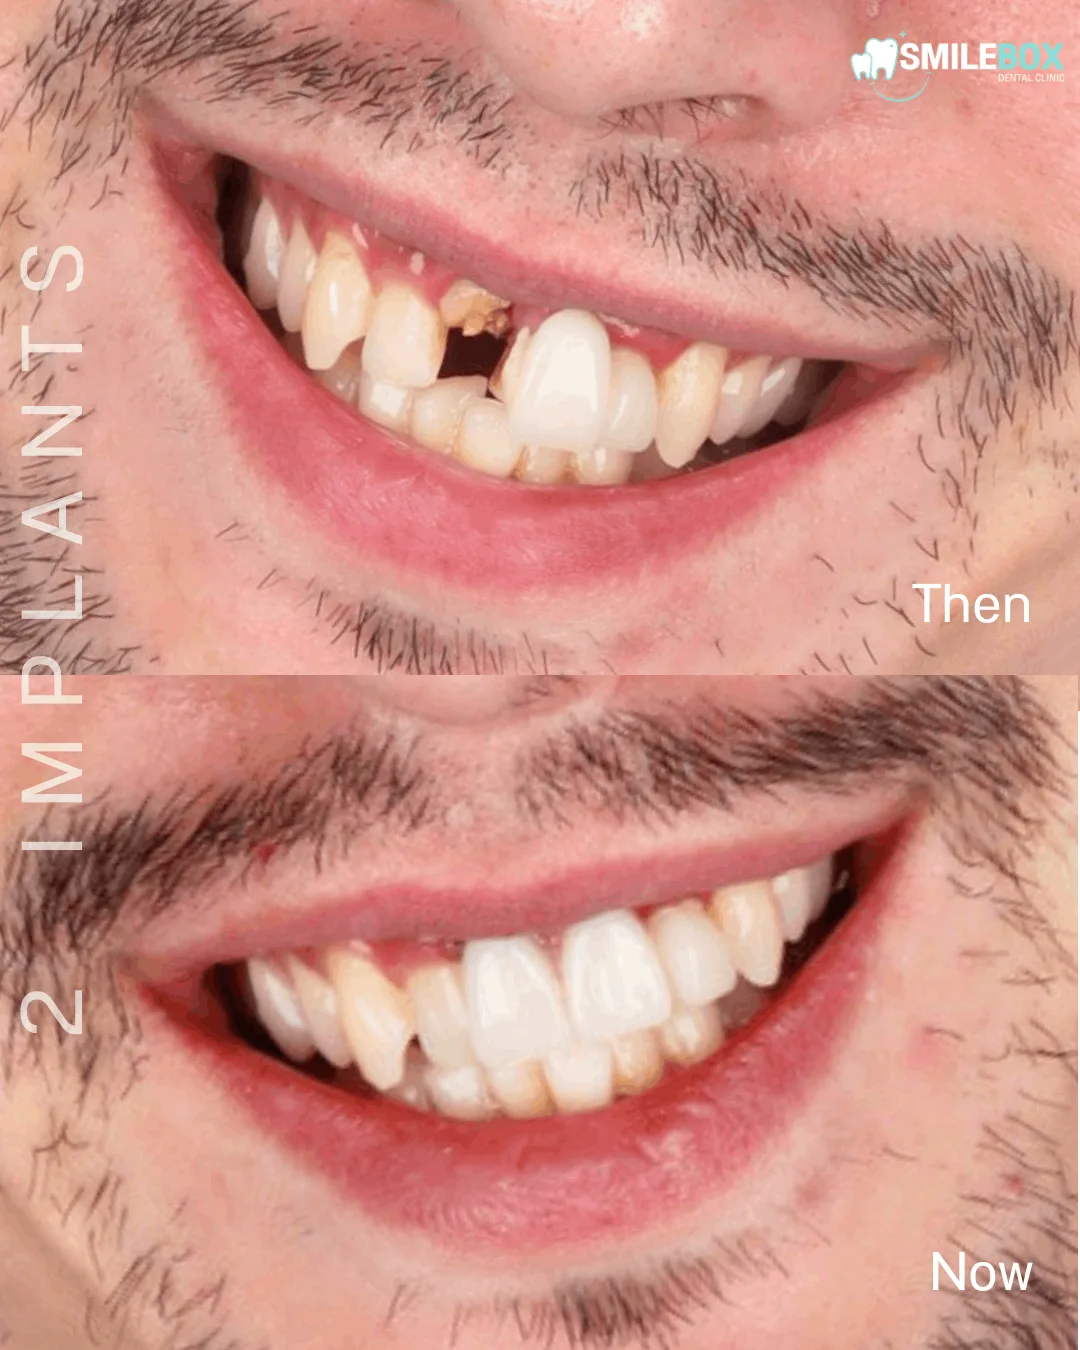
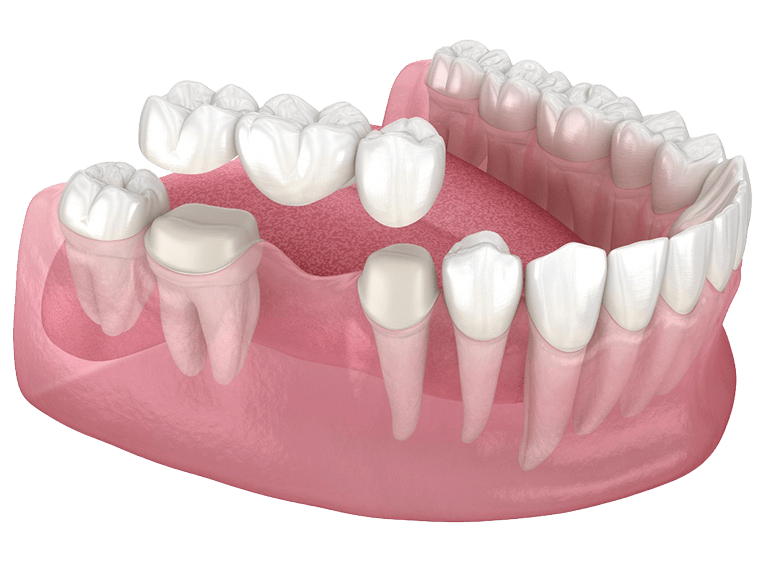
Option 2: Placing 2 Implants as a Bridge
Another option is placing two implants at either end of the missing teeth and using them to support a dental bridge that replaces the middle tooth. This solution is more affordable than placing individual implants. It's often ideal for replacing several adjacent teeth while maintaining a secure, permanent fit.
Alternatives: Removable Partial Denture
For patients seeking a more affordable or less invasive option, a removable partial denture can be used. This treatment consists of artificial teeth attached to a gum-colored base, which can be removed for cleaning. While it’s less stable and durable than implants, a removable partial denture is a good short-term solution or for patients who may not be candidates for implants due to bone loss. Dental implants can be a game-changer for restoring missing teeth, providing long-term benefits like improved bite, speech, and overall appearance. If you're considering replacing multiple missing teeth, speak with your dentist to explore the options that best suit your needs and lifestyle.
How long does it take to finish my implants?
At SmileBox, we make the dental implant journey as efficient and comfortable as possible. After the initial healing period (usually around 2–3 months), the final crown is completed in just 4–5 days—requiring a total of only 3 visits.
Our first step is to assess your dental health and determine if dental implants are the right treatment option for you. During this consultation, we will also discuss your goals and expectations for treatment.

Medical History Review
Assessing medical conditions and medications to ensure you’re a suitable candidate for implant surgery.
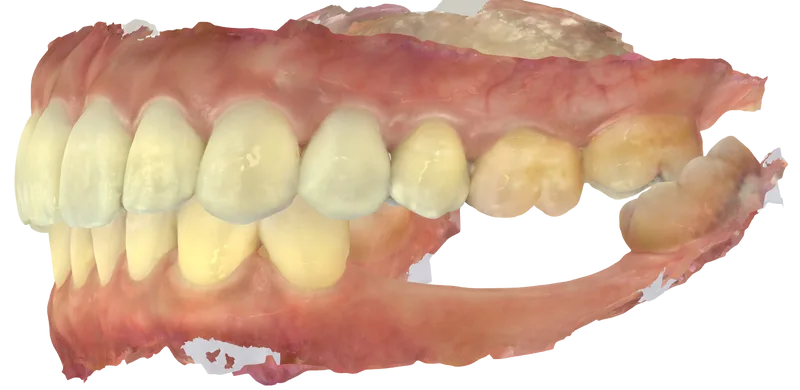
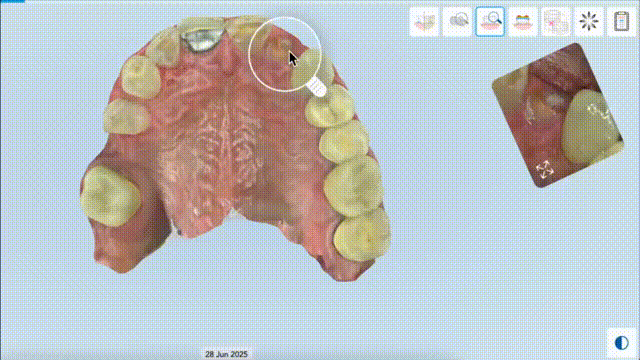
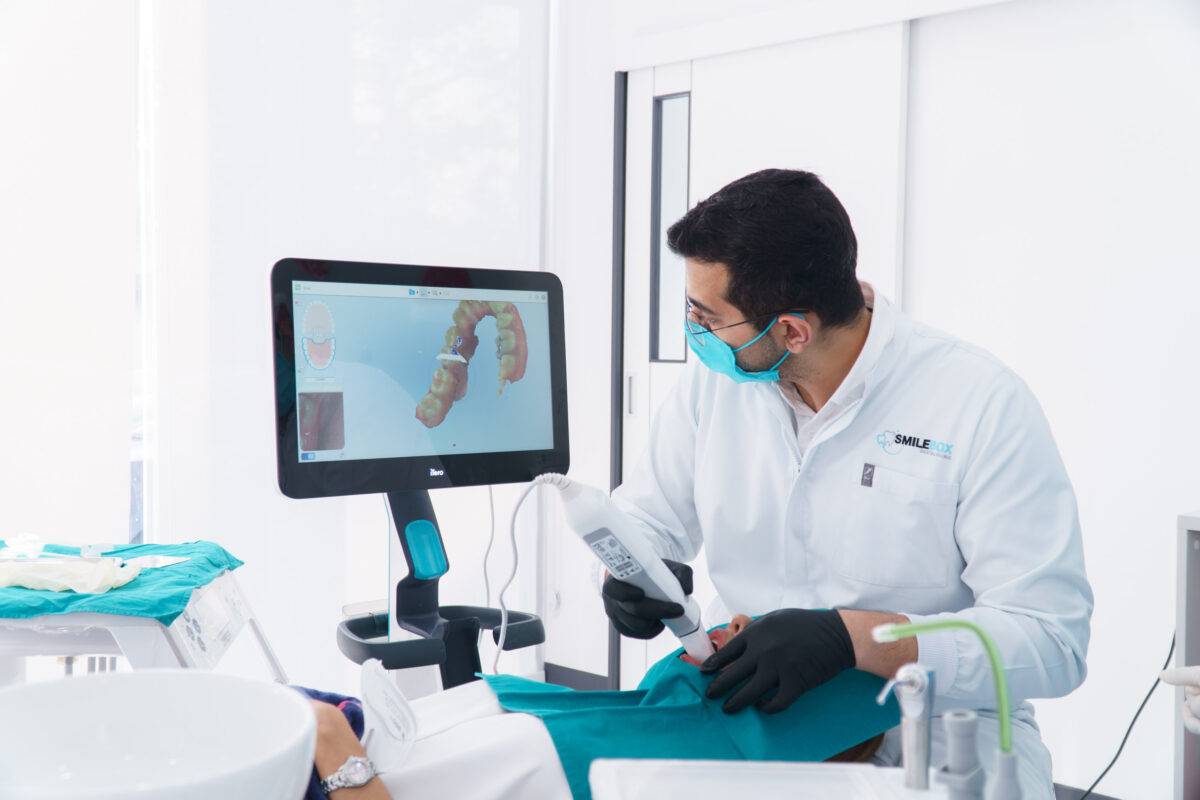
Intra-oral scans
similar to conventional impressions - these scans can help our dentists visualize your teeth from all angles
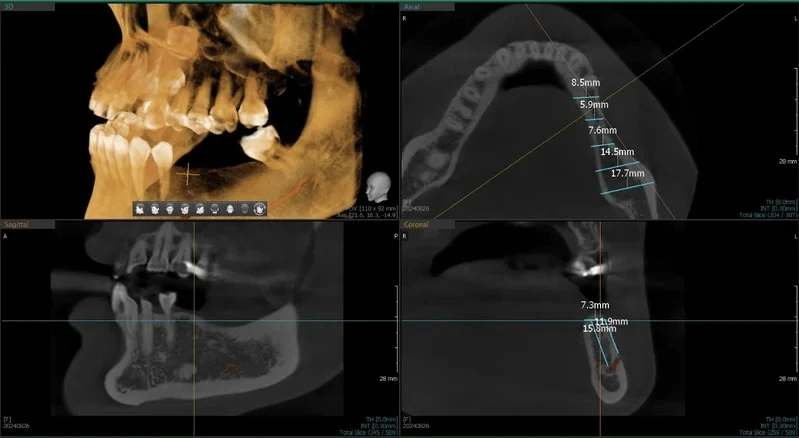
X-rays and CBCT scans
to analyze bone quantity, quality and bone loss. Our doctors use this to digitially plan out the implant size and position considering bone availability and important surrounding anatomical landmarks like the sinus and IAN nerve.
Clinical examination
Evaluating the site of missing tooth/teeth, the neighbouring teeth condition, the space between implant site and opposing teeth, and gum tissue health.
If the tooth is already removed: We'll evaluate the bone and gum tissue in the empty site.
If the tooth needs to be removed: We consider its condition, including:
- Presence of infection, such as an abscess at the root tip or pus.
- Whether bone grafting is required due to active infection or insufficient bone.
- Feasibility of immediate implant placement versus delayed placement.
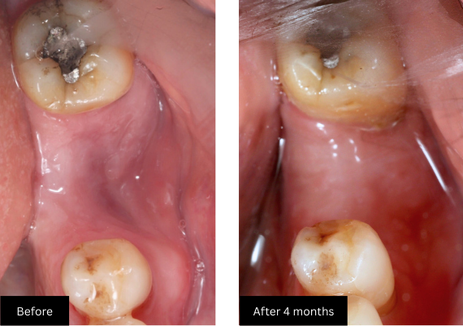
If you have a tooth that needs to be removed, it may be necessary to wait one to three months before an implant can be placed. During this period, a denture may be made as a temporary for you to use.
Before starting your dental implant treatment, a detailed plan will be created by your doctor. This plan is tailored specifically for you to ensure the best results. During this stage, the entire process will be explained, and any questions or concerns you have can be addressed, giving you confidence and clarity before treatment begins.
Digital Smile Design
Once we have confirmed that you are a viable canditate for implants and implants are a suitable option to restore your missing teeth, we start by planning the final position of the crown using a digital approach known as digital wax-up. When designing the implant crown, we evaluate the adjacent teeth and the bite (opposing teeth) to determine the exact size and dimensions of the crown. The crown must also be both functional and aesthetically pleasing.
Clearing all necessary treatment
Before starting your implants treatment process, it is important to ensure that any existing dental issues, such as cavities or gum disease, are treated. This may involve procedures like fillings, root canals, or wisdom teeth removal to ensure that implants treatment is successful and long-lasting.
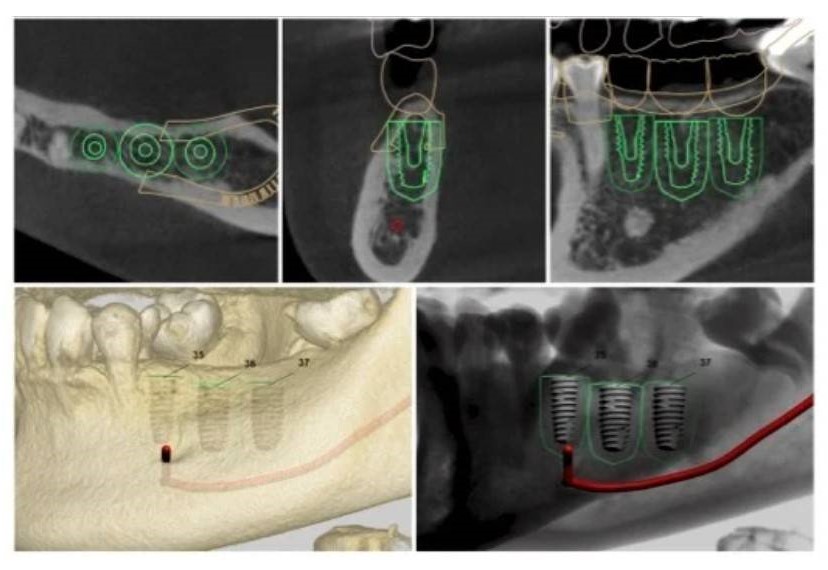
Planning the Implant
Once the crown position is finalized, the implant placement is meticulously planned in 3D considering the adjacent teeth, available bone and important anatomical structures like the sinus or IAN nerve. The final implant position, depth and size is finalized for optimal stability and crown support.
Implant size (diameter and length) depends on different implant systems. Click here to explore the implant systems available at our clinic.
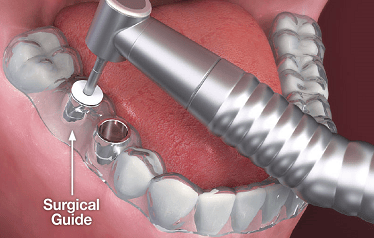
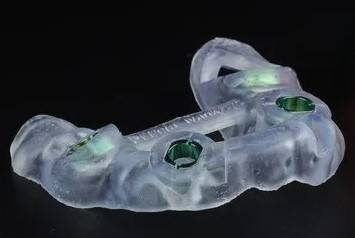
Based on the detailed 3D planning, a surgical guide is created to assist in the implant procedure. A surgical guide is a custom-made template that:
- Ensures the implant is placed exactly as planned in terms of depth, angulation, and position.
- Minimizes the risk of errors, enhancing precision and predictability.
- Reduces surgery time and facilitates better outcomes, especially in complex cases.
Surgical guide cost = 3,000 THB
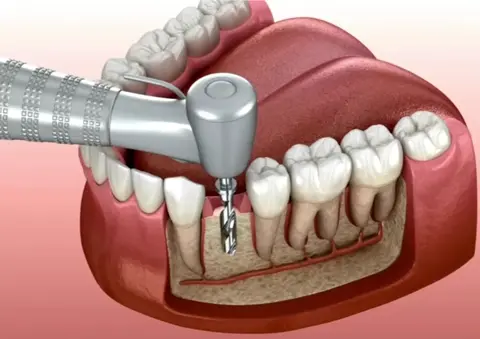
Implant Placement
Implant placement can follow one of three protocols:
- Immediate Placement: Implant is placed at the time of tooth extraction.
- Early Placement: Implant is placed 4-8 weeks post-extraction to allow soft tissue healing but before significant bone loss occurs.
- Late Placement: Implant is placed several months after extraction when complete healing has occurred.
The choice of protocol depends on factors like infection, bone availability, and patient-specific needs.
Once the implant is placed in, either a cover screw or a healing abutment is attached, depending on individual case factors.
- A cover screw is typically used when the implant is left to heal fully beneath the gum tissue. This approach is preferred when the implant’s primary stability is moderate, or when extensive bone grafting or sinus lifting has been performed. It allows undisturbed healing beneath the gums and reduces the risk of infection or pressure on the implant during early healing.
- A healing abutment is placed when the implant has achieved excellent primary stability and the bone condition is favorable. It extends slightly above the gum line, shaping the gum tissue and allowing for easier access during the second stage or impression-taking phase.
The choice is based on your specific clinical condition to ensure the best long-term outcome and integration of the implant.
The procedure is done under local anesthesia, with post-op medication provided for your comfort. On average, surgery takes about 30–45 minutes per implant.
After placing the implant, a healing period of at least 2 months is required to allow the implant to bond with the bone (osseointegration) before we begin the prosthetic phase.
Bone Grafting
Bone grafting may be necessary if there is insufficient bone to support the implant. This can be performed:
- Before Implant Placement: Allows adequate bone healing prior to the implant procedure.
- Same time as Implant Placement: Saves time by combining the procedures.

Sinus lifting
Sinus lifting is required when the upper jaw's bone near the sinuses is too thin for implant placement. The procedure involves lifting the sinus membrane and adding bone graft material.
Click here to read more about sinus lifting.After a healing period of at least 2 months, allowing the implant to bond with the bone (osseointegration), we begin the prosthetic phase. This process is carried out by a prosthodontist or a restorative dentist. Every detail, from color to shape, is carefully matched to your natural teeth for seamless results.
Digital Scan & Impression
Once healing is complete, we re-evaluate the implant to ensure it’s ready. If stable, we take a digital scan to design your final prosthesis. This step is quick, comfortable, and allows for precise results. Your crown will be ready for placement in about 4–5 days.
Prosthesis Placement
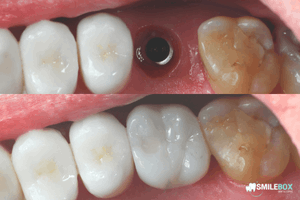
The artificial teeth are placed over the implants for a trial fitting. During this step, minor adjustments are made to ensure proper size and bite. Once you and our doctor are happy with the fit and appearance, the new teeth are permanently attached to the implant - either with a screw or bonded with adhesives.
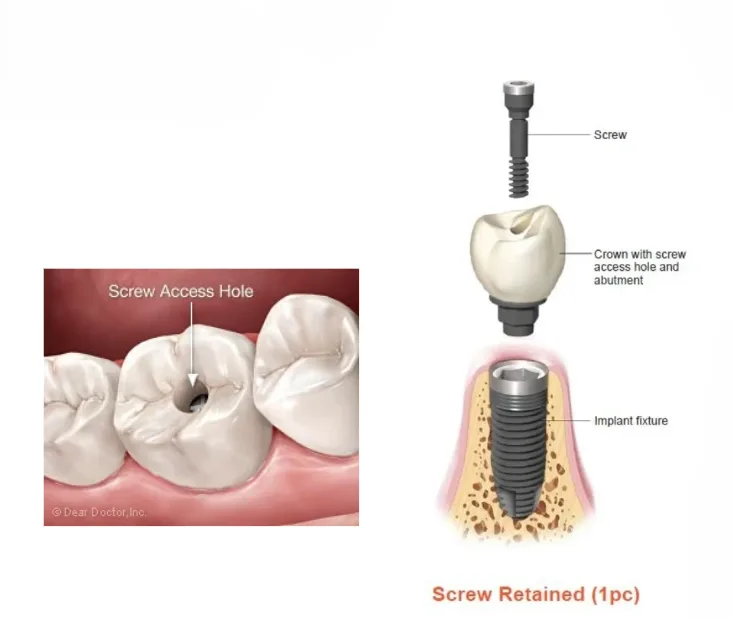
✔︎Crown has a “hole” on the top to allow for screw to pass through to
the
implant
✔︎Abutment + Crown (one piece) secured to implant with a screw
✔︎Screw access Hole is sealed with tooth-colored filling
material
✔︎Crown is retrievable - means it can be removed by the dentist for
maintenance
✔︎ No cement required
✔︎ Crown may chip near access hole (very low incidence)
✔︎ Cosmetic appearance may not be as ideal (usually not visible)
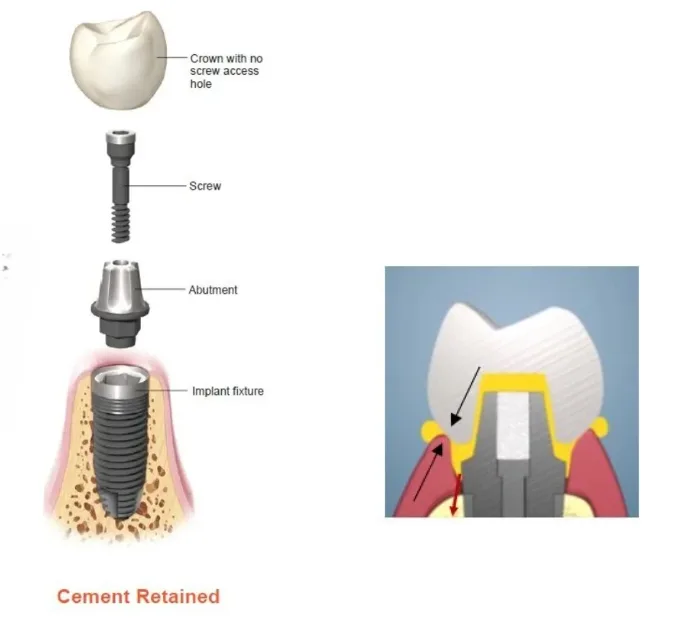
✔︎Abutment is secured to implant with a screw
✔︎Crown is then secured to abutment with cement (dental glue)
✔︎Crown is not retrievable / cannot be removed after cementation
✔︎Better esthetics
✔︎Excess cement under the gums during the cementation process can
cause
inflammation and bone loss
Which one is better - screw-retained or cement retained crown?
Each method has its unique benefits, and your dentist will guide you in choosing the one that best suits your needs. If you’re considering dental implants or have questions about the process, contact us today to schedule a consultation. Achieve a confident smile with our personalized implant solutions!
How long before I can eat and chew with my implants?
Once your new teeth are placed, you should be able to eat, talk, and smile right away without any problems. Your dentist might ask you to come back for a follow-up appointment to re-tighten the screw, to close the screw access hole or to do a final check.
If you have any questions or need more information, feel free to contact us. We’re here to help!
Each method has its unique benefits, and your dentist will guide you in choosing the one that best suits your needs. If you’re considering dental implants or have questions about the process, contact us today to schedule a consultation. Achieve a confident smile with our personalized implant solutions!
Schedule Your Implant Consultation Now
Click below to book your personalized dental implant consultation with our experts
Not in Thailand?
You can simply email your inquiry along with a few clear photos of your teeth to [email protected] . Our Dental Consultants will get back to you as soon as possible.
If you need immediate assistance, please call us directly at (+66)2-402-9542, or reach out to us on Whatsapp at (+66)63-352-3691. We’re here to make you smile again.
After-care Instructions & Maintenance for Bridge on Implants
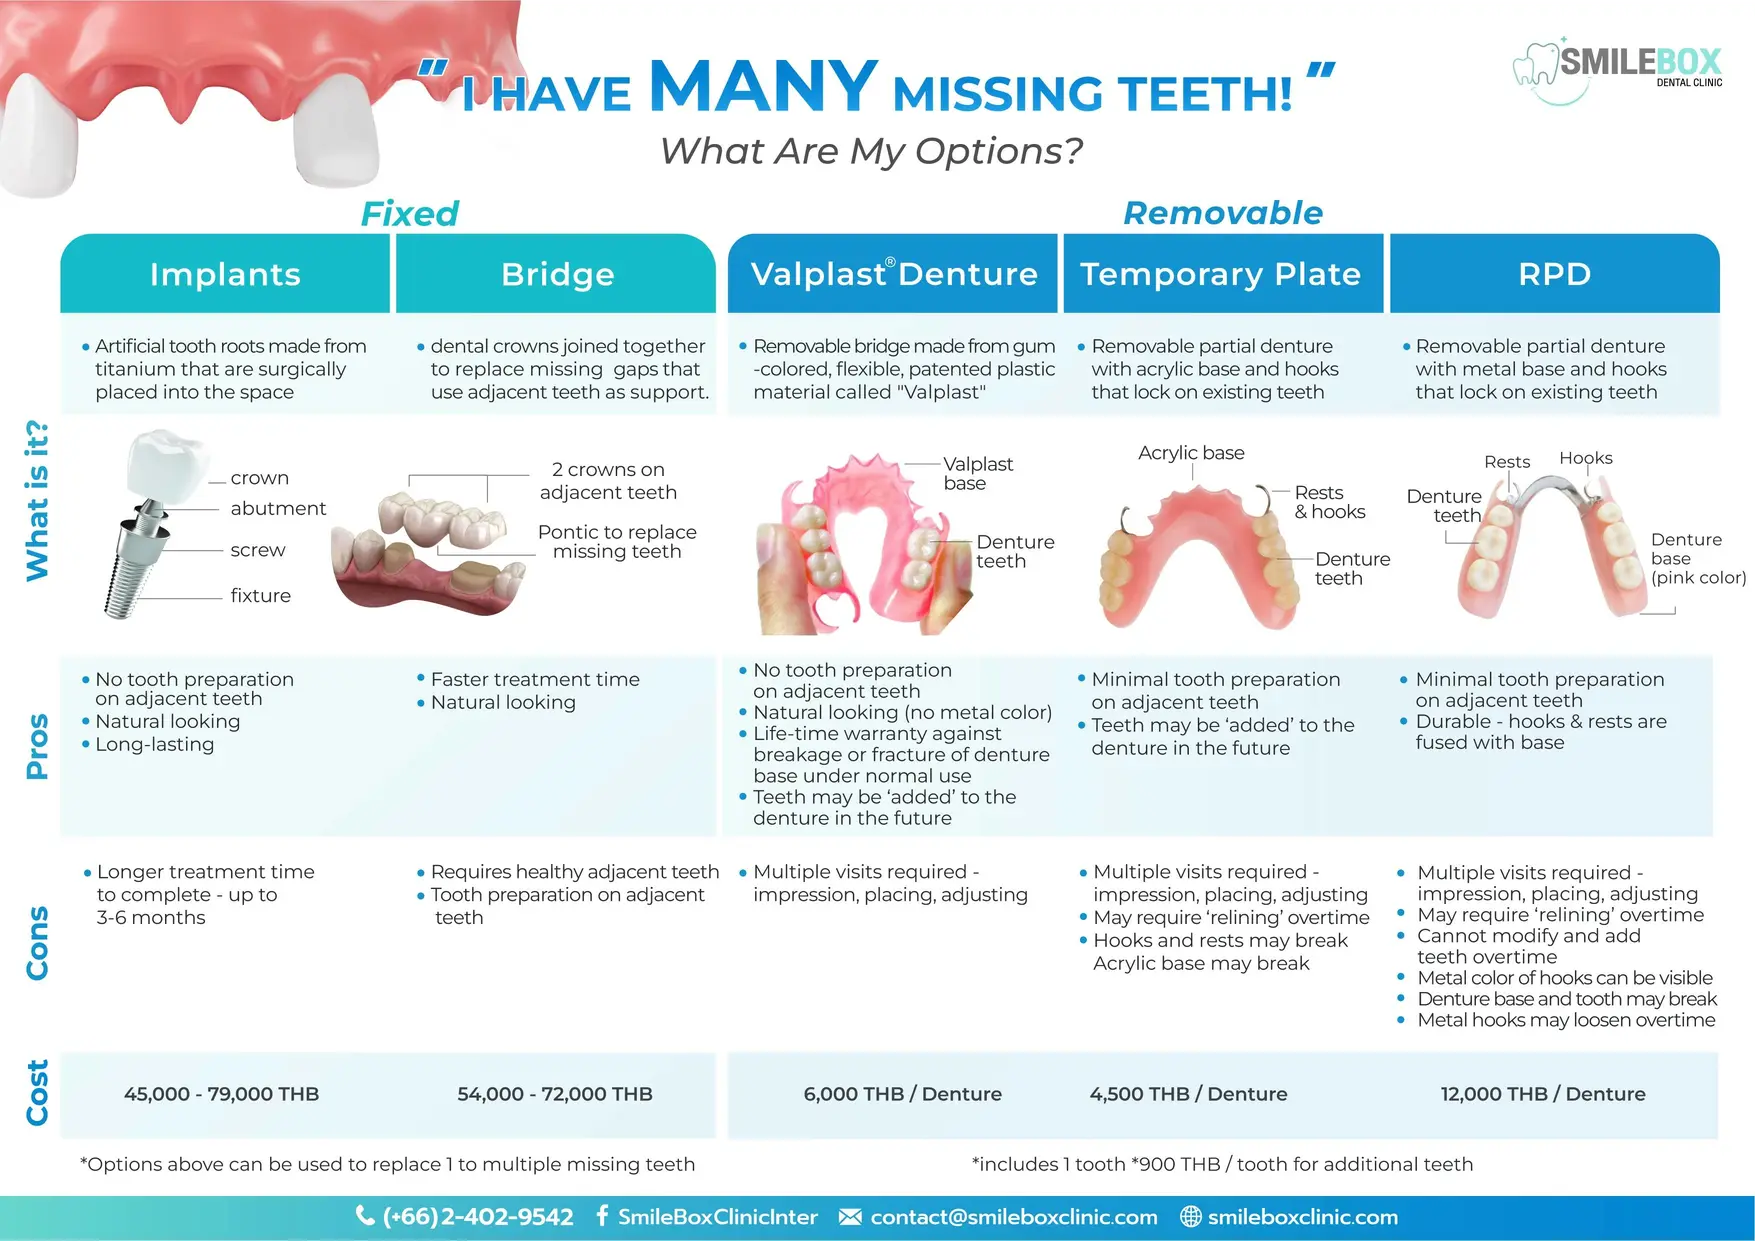
Alternatives to Multiple Dental Implants
If you're considering alternatives to dental implants for replacing many missing teeth, there are several options to choose from, depending on your needs and preferences.
Fixed Dental Bridge:
A fixed dental bridge consists of one or more artificial teeth supported by adjacent natural teeth. It is permanently cemented into place and does not require surgery. However, if any part fails or requires repair, the dentist will have to remove the entire bridge and make a new one. Healthy neighbouring teeth also require tooth preparation and alteration to support the bridge.
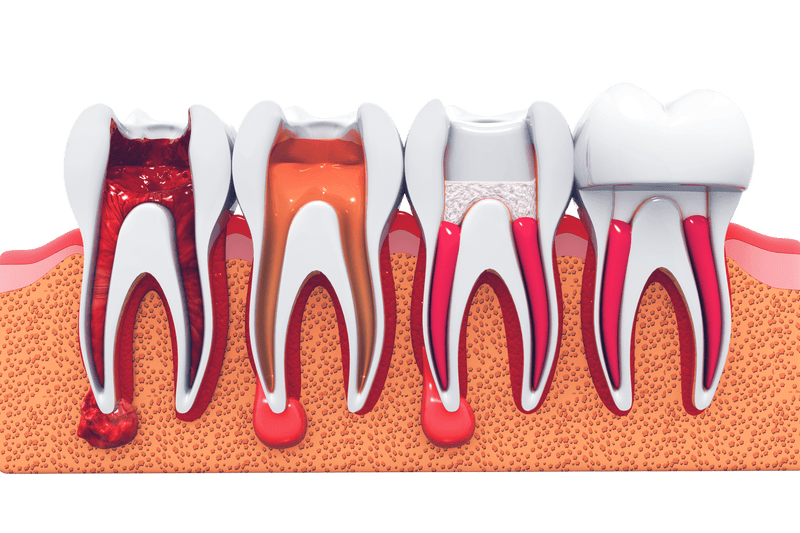
Root Canal Treatment:
If the tooth can still be saved, a root canal is a treatment can be done This procedure removes the infected or damaged pulp inside the tooth and seals it to prevent further decay. After a root canal, the tooth is usually restored with a crown for strength and protection. This option is ideal when the tooth’s structure is intact but the pulp is compromised.
Book an Appointment Now
You can simply email your inquiry along with a few clear photos of your teeth to [email protected]. Our Dental Consultants will get back to you as soon as possible.
If you need immediate assistance, please call us directly at (+66)2-402-9542, or reach out to us on Whatsapp at (+66)63-352-3691. We’re here to make you smile again.